Showing posts with label New Zealand Jewellery. Show all posts

Thursday, May 7, 2015

Can jewellery ever be Art?

There are those that do not consider any form of Jewellery to be ART, does that mean that all paintings are ART?

Most of my work is constructed from ideas, messages I want to send or times I want to commemorate, stories that I feel need to be told is this not ART?


Saturday, April 18, 2015

Dark Angel Pendant


This was my entry into the very last national Jewellery competition in New Zealand some years ago. I understand sponsorship to hold such competitions is difficult to obtain.
My piece has examples of all sorts of my work. casting (in Art Clay pure silver and copper) I created the moulds 1st  using polymer clay, not hard, then formed and kiln fired the metal clay pieces. Not hard and I find this method of "casting" safer and easier to carry out if working alone than traditional methods of casting.  I  rolled the "wing" pattern into recycled copper using a rolling mill and autumn dried leaves. I have  
traditionally set the garnet.


Sunday, April 5, 2015

Friday, August 29, 2014

What I see out my Window New Zealand Deer Earrings and Brooch

Courtesy of our neighbours whose deer have big rolling paddocks, gullys and trees to live in, yet their curiosity draws them to the fences for a chat each day. Over the years Stag Number One has shown a special interest in human observation and interaction.
http://artjewellerybymarianb.blogspot.com

These earrings are made with some great purchased components from New Zealand's www.craftrunner.co.nz  Jewellery supplier,  some stone beads I purchased at a Rock and Mineral Show and  a few handmade fittings.  


Old Number One
My Inspiration                    


http://artjewellerybymarianb.blogspot.com
 
and of course there are Mum's and fawns too
 

Sunday, August 17, 2014

New Zealand Spirit Brooch Original

 
The Human Spirit just keeps on  keeping on.....Remember that when things get tough!


 I'm refreshing my spirit by looking through old techniques recalling past achievements (and disasters )  What seems a disaster or insurmountable at the time can often turn out to be helpful in the future.
This is the first one of the series If you look closely you will see a small crack in the Paua (tail) and a hole drilled right through (top left) I  made the holes in the Paua the same size as the holes in the copper and when  riveting it was too tight. The holes in the Paua need to be  at least .5 (half) a hole bigger than the metal to allow for the expansion of the silver rivets.(Experimentation) The other hole well that was just a mistake in the planning. It could have filled it with a rivet but I quite like the way the colour of whatever the brooch is pinned on just shows through.
Sticky backed genuine Paua sheet has advantages, can't "move" around when riveting but that makes it fairly unforgiving. I never found a successful way of drilling Paua and metal sheet together, using a Drill Press they always had to be drilled seperately.
This failure became the protype for a lovely brooch series.


Friday, August 15, 2014

Fingernails?? or rings ?? or earrings??

 These were originally offcuts from one of my Dunedin Art School projects "out of the Box"  possibilities. However the shape and its  possibilities so fascinated me that  using a shield shaped template I cut, annealled and shaped (with a rawhide mallet) on a metal mandrel these little objects. Thanks go to all those at Art School  who played with them discovering new dimensions for their wearability and acting as models.


Saturday, December 28, 2013

There were tombstone pendants and Mourning Rings too

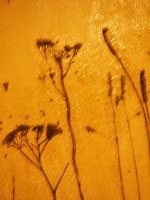
Some were imprinted with living plants then filled with black  glaze and overglazed with clear  and some contained the actual plants in a dried and pressed state. The  firing out kiln process worked great so long as paperclay and glaze right thickness. (Just trial and error that)


http://artjewellerybymarianb.blogspot.com/


Sometimes the Mourning Brooches looked like.... 4 examples


or this
or this or this
                                 
 but not so blurry
http://artjewellerybymarianb.blogspot.com/

Wednesday, December 4, 2013

We all have our own crosses to discover

http://artjewellerybymarianb.blogspot.com/


My cross comes from my identity and manifested itself in these brooches made from fired glazed ceramic clay and paper does anyone want to know how they were made?
see below for further details.


Firstly learn to slice white clay as thin as you can rolling it out makes it curl.


While base between 2 &4mm thick is still damp dip your materials in a mixture of a quarter recycled white paper shredded and mixed with 3 quarters white clay


Like this BELOW
Dry for several days
Bisque at 1100 degrees
glaze with clear ceramic glaze
Dries in an hour or two
Refire 15 hours at 1200 degrees
 transformation !


Not finished yet
Smoth base on diamond stone grinder. It's very hard even though brittle

I used sandblasting to grind out even indents to adhere the little silver fittings I cut and soldered for brooch pins


two part epoxy glue took 3 days to set but not one out 10 pulled out when I put in brooch pin backs even double ones and that's a great test.